Sunday, 8 March 2009
Original Design
I feel that now that I have talked about how I made my animation it is important to talk about how it has ended up in relation to how I originally planned it out in my storey board. From the storey board I have use all of the elements that I wished to use, the three that I talked about is Hello Kitty smiling, waving and doing the garden however I did add another action in. The action that I have added that wasn’t in the storey board is Hello Kitty winking, the reason for me adding this in as I have talked about in a previous post is from watching more Hello Kitty animations, and noticing that she tended to wink on several occasions, this seemed like a good idea to add in a winking motion into my animation. If I am talking about my final product in relation to my initial idea then it has changed a huge amount as my initial idea was to have a DJ. The main reason that I did not use this as my final product is that when I made a design of the animation instead of making a character based film I made an object based film, this lead me to think I should maybe change to a situation where a character could be the main focal point. I am happy with how the final product turned out, I feel that preparation with the design of Hello Kitty was good as I created a method to draw Hello kitty using the straight line tool and I kept the method consistent throughout. One of the main reason for me creating this character is due to my nieces interest in Hello Kitty and I thought that it would be nice if u could show her something that I have created that resembles Hello Kitty.
Production Process & Aesthetics
When dealing with the production process of creating a flash video I feel that initially it is important to define all of your layers prior to creating any images. If you do this it creates a natural platform where all other components come together to make a flash video. As you can see from my screen dump below my video contains many layers. Each individual part of my Hello Kitty design is built on a separate layer.
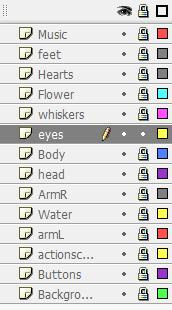
As you can see from the screen dump below I have created each layer prior to the creation of the animation, now from this I will build on the work platform and create my Hello Kitty animation. I will show you individual layers and how it builds up to become a final animation. I will start by talking about the background.
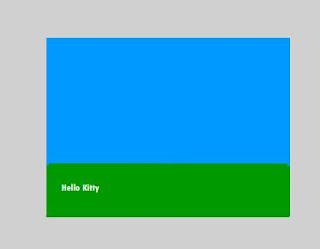
The image above is a basic view of the animation background, as I have said before I wish for my Kitty to be sitting on the grass when this animation, therefore I have created an image that resembles grass and a sky. Also from what I talked about in a previous post I have my text on the screen that says what the video is. I was able to achieve this by using the square tool, the icon can be seen below.

When creating a square it is important that you use the colour tool that is shown below. As I wanted to create grass I chose to use a green outer line with a green inside, this is because everyone associates grass with the colour green, I feel it works and that you can see that represents grass. Again I used the same technique when creating the sky, I used the square tool with a blue outer line and a blue fill, again representation also allows for the colour blue to represent the sky.


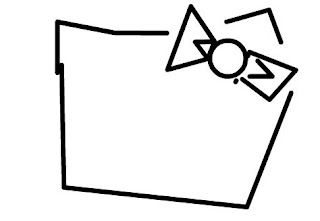
After I created my background I decided to create my actual Hello Kitty character, I started by creating the head of Hello Kitty, to make the head I used the straight line tool and then used to the curve tool to bend the line. I will show how the image looks with only straight lines and then how it looks after I have created the image. The image below is of Hello Kitty’s head without using the curve tool.
The image prior to curve tool
The image when curve tool has been used
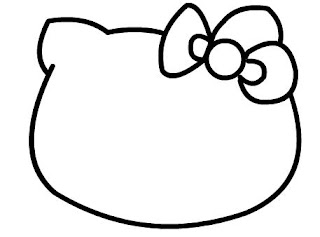
As you can see from a simple readjustment of lines you can create an image that resembles the Hello Kitty character. To use the curve tool you need to select the pointer device on the tool bar, the icon is shown below. To use the tool you need to go next to a line which you wish to curve however you do not select the line you just go close to it, the pointer will change to a curved line which indicated that you are close enough for the curve to take effect.

You will then start to use the fill tool, this allows you to add colour to an image if all the lines meet up. Also in the image below I have ensured that the bow is of more quality. If you enlarge the image then you will be able to see that the head is white and the box is read, however due to the fact that I have connected al the lines you can select the background, this is indicated by the black dots.
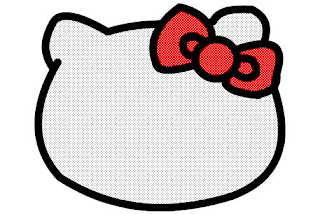
Now that I have created the head I use the same style of technique to create to rest of the Hello Kitty character I will show in screen dumps each individual body part of Hello Kitty and then show it all joined up to create a final image.
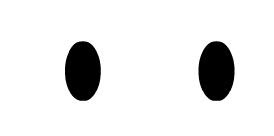
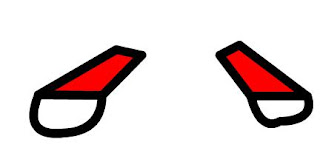
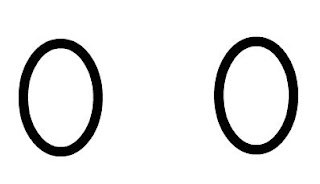
From the head it is important to have the eyes as this is a clear defining feature of Hello Kitty, as many of my actions include eye movement it is important for the eyes to be on a separate layer. To make the eyes I used the circle tool, I used a black outline with a black fill, the button for the circle tool can also be seen below.

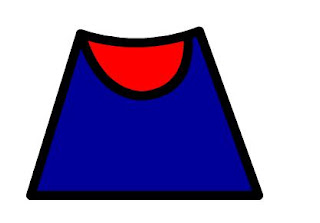
The next image is of the body of hello kitty again I used the line tool to create a basic outline and then used the fill tool to colour the outfit of Hello Kitty in, also to create the dress look I had to create two lines and then use the curve tool to bend the two lines to make it look as if there are two garments.
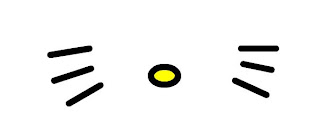
Next I will be showing you the whiskers; this was a very simple drawing as the whiskers on Hello Kitty are just straight lines that emerge from the cheeks of the Kitty. For this I used the line tool with no curve. Also in the whiskers layer I decided to include the nose as usually if you move your nose your cheeks would also move, this is from looking in the mirror and emulating facial expressions and seeing what moves with what. The whiskers are all created with black lines and the nose has a black outline with a yellow fill.
Arms are important in the production of Hello Kitty animation due to the fact that allot of the actions that I want her to do will include the movement of her arms. Also I want on occasions for one arm to move however the other to not, therefore I decided to make a right arm layer and a left arm layer. They are essentially the same image but flipped over, they are made using the same tools and fill, and the reason for this is consistency. I used the straight line tool and the curve tool to make the arms, the curve tool is for paw at the end of the arm. I did this by creating two lines and then curving each side so that it would create a semi circle almost.

From watching videos of Hello Kitty and looking at pictures the feet of Kitty is important as they have not changed since the original design, therefore I have chosen to conform to the norms and create the feet in the same style. To create the feet I used the circle tool with a black outline and a white fill, and to ensure consistency I copy and pasted the original foot. The image below is of the two feet.
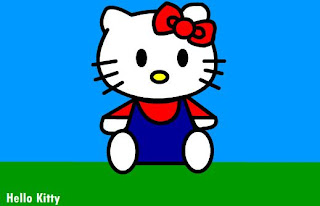
Now that I have drawn out the image of Hello Kitty on separate layers, and drawn out a background I will now show all of the layers together to see how it looks. The image below is of all layers shown.
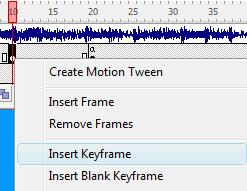
One of the parts of this assignment is the inclusion of user interaction with a character; therefore I am going to create buttons for the users to select which will result in an action. The first action that I am going to create is for Hello Kitty to wave. I decided to make this frame by frame as I liked the jolty look that it brings, the reason for this is that it reminded me of Hello Kitty’s anime origins where fast movements are not smooth but you only see the beginning and end of the movement. The way that I did this is by locking all other layers on the layers task bar, a layer is indicated as being locked when there is a padlock symbol on that layer. I started this movement on frame 10. I started by adding a key frame onto the timeline you can do this by right clicking on the frame you want and selecting insert key frame. The image below shows this taking place.
On this key frame I move the arm to a higher position than normal to try and create the action of waving, I did this by select the free transformation tool on the toolbar. The icon for this tool can be seen below.

This tool allows you to move item about on a selected layer, the image below shows what it looks like when you select the tool and then the object to move. If you go to the corner of the image you can then move the object by angle this is the perfect tool to create a wave motion as all you need to do is change the angle of the arm several times.
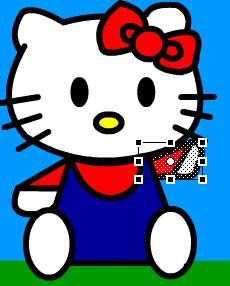
To change the arm movement several times it is important to add many key frames, the screen shot below shows how it looks on the timeline with the key frames.

As my video is going to be controlled by buttons with a stock image as an opening screen it is important to include the buttons in the production of this movement. So I created a new layer called button, created a square and then converted it into a button. This is done by selecting the square right clicking on it and choosing convert to button, the image for this can be seen below.

When you select this option you are given a new dialogue box that pops up. This can be seen below.

After you have done this when you double click on the button you are given another set of options on the timeline, this again can be seen below. On this menu you can select what happens to the button when an action is performed clicking, hovering, standing and when the button is pressed.

To ensure that the button works you need to add some action script the way to do this is click on the button and select the actions option on the menu. You will then be given another screen where you will add action script to you flash project.
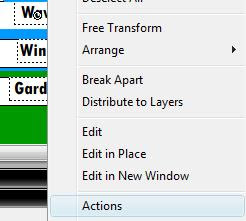
The action script needed is to start playing a video at a certain point in this instance it is at frame 10, the image below shows the code needed to play the video at that point.

The problem with this is that it will continue playing the video until all the frames are over so in the timeline I selected at frame 20 for it to go back to frame 1. The screen shot below shows this.
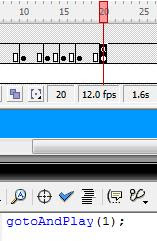
Another problem that I needed to sort out is the fact that when the video is first played it would play regardless of a button being pressed therefore on every frame at frame one I needs to add some action script that tells the video to not play. This would ensure the movie is entirely user dependant.
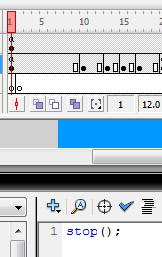
The only layer that this does not apply to is the layer with music on it this is because I wanted a continuous loop of music regardless of a button being pressed or not.
The smile button and animation works on the same principle, it is a frame change rather than a motion tween or a shape tween. Again the reason for this is the origins of the Hello Kitty anime and the sharp movements to emphasize emotions.
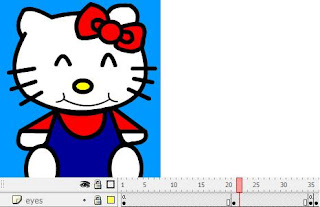
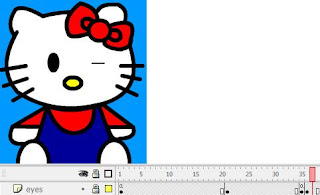
And once again the wink button works on the same principle as the other two, I decided to add this into the buttons as I did some more research on Hello Kitty animated series and I noticed that in one particular episode Hello Kitty winked a considerable amount. The sharp wink again is in line with the origins of the anime nature of Hello Kitty.
The last action that I will talk about is the button called gardening; this is a more complex animation as it included frame by frame action as well as motion tween actions. When you press the button which the action script is set to start playing at frame 40, the first thing Hello Kitty will do is stand up. The way that Kitty stands up is via a motion tween, I selected all of the component layers that make up her body and inserted a key frame 5 frames later on this key frame I then moved Kitty up to where i want her to be when the motion tween is finished then I right clicked on the timeline and selected add motion tween. All of this is shown in the images below.
All images selected except feel (will be clear later)
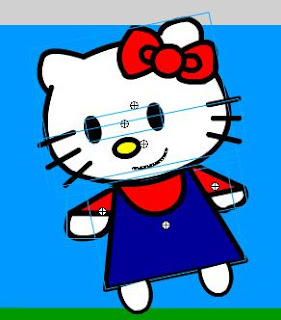
The timeline and motion tween from frame 40-45
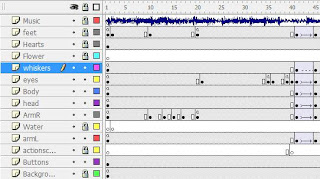
The feet however are a motion tween and a resize; this is because if the feet would have stayed the same it would not look rite. Along with this the eyes do not go straight up but to the left as to indicate where Hello Kitty is going to water the ground. On the left hand a watering can appears, this is built on a separate layer. The eyes feet and watering can are all shown in the screen shot below.
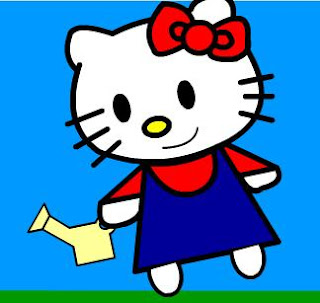
After Hello Kitty has angled to face towards the ground water in the form of droplets come out of the watering can and drop to the floor. This water is made out of blue paint dots and converted into a movie clip. This is done in the same way that you convert to button. The screen shot below shows the process.
Result of right clicking on group of images
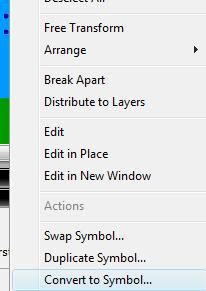
Dialouge screen given

When converted in a symbol it will appear in the Library
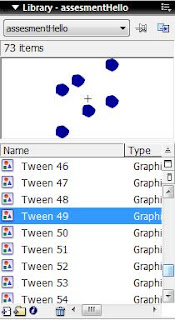
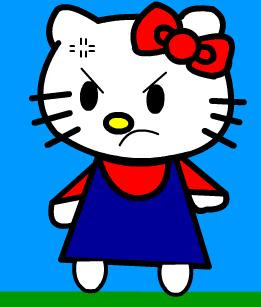
The motion tween here is the motion from Hello Kitty bending down and the water coming out of the watering can towards the floor. The next action on this section that Hello Kitty takes is to stand upright again and then become frustrated with the fact that a flower hasn’t bloomed yet. She frowns and eyebrows turn downwards towards the ground. Again from watching Hello Kitty animation series I have seen that when a character gets angry it is a sudden explosion of anger therefore again I chose to have it a sudden change of expression compared to a tween. The screen shot below shows the angry emotion.
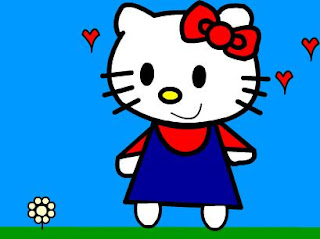
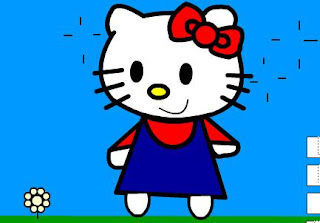
The next thing to happen in this animation is a flower emerging all of a sudden and Hello Kitty’s facial expression changing all of a sudden. This once again keeping in tradition with the previous emotion changes is sudden. As anime has a tendency to take things to extreme emotionally, I felt that when the flower grows that love hearts should appear from above Hello Kitty’s head. This can be seen below. The Hearts have been drawn using the pencil facility in macromedia flash and then converted into a movie clip and given a motion tween to drop from the sky. Once they are recognised the hearts then disappear. I achieved this by deleting the hearts and adding lines to represent a sudden change.
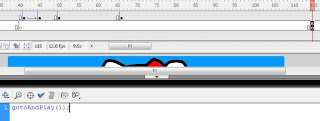
After this has happened once again action script will take the video back to the start. The action script can be seen below.
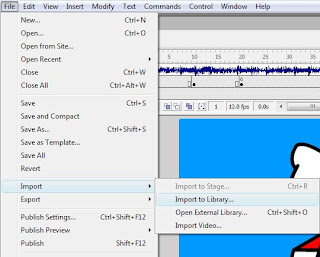
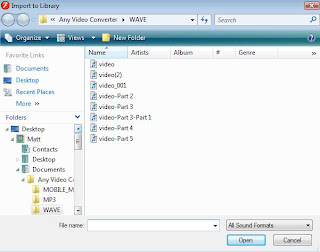
When my Hello Kitty animation is playing I wanted to use the opening soundtrack to the series Hello Kitty and friends. Therefore I purchased an episode of Hello Kitty and friends and then converted the .fla to a .wav file. I did this by using software called any video converter. From this I then used another piece of audio software that allowed for the chopping and exporting of .wav files and played it in my flash project. After it was inserted into my project I made the song on a constant loop and for the song to start when the video is first started. Initially the song was on play on event which resulted in a terrible overlap. So to create the sound I made a new layer and called it music, and then in the bottom tool bar it has an option for music. The image below shows the tool bar for music. To import the song you need to select file import and then select import to library, you will then be given pop up and a route file with sounds in them. You select the sound you want and then it will be stored in the library.


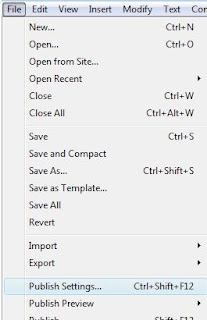
When you have produced your flash video and are ready for the final version to be published you need to select the option from the file toolbar called publish. The screen shot below shows the action of publishing and the options selected that would allow the user to publish. For the sake of demonstration I have gone into the publish settings to show you what I have done.
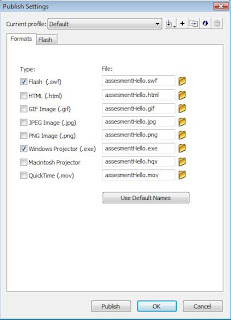
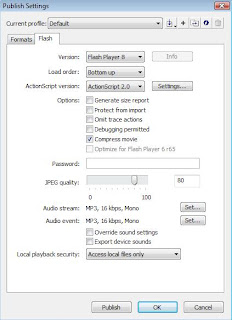
The file formats required for this assessment is an .exe and an .flv in flash player 8. As you can see from the screenshot below that I have both of these formats selected ready to be published

As you can see from the screen dump below I have created each layer prior to the creation of the animation, now from this I will build on the work platform and create my Hello Kitty animation. I will show you individual layers and how it builds up to become a final animation. I will start by talking about the background.

The image above is a basic view of the animation background, as I have said before I wish for my Kitty to be sitting on the grass when this animation, therefore I have created an image that resembles grass and a sky. Also from what I talked about in a previous post I have my text on the screen that says what the video is. I was able to achieve this by using the square tool, the icon can be seen below.

When creating a square it is important that you use the colour tool that is shown below. As I wanted to create grass I chose to use a green outer line with a green inside, this is because everyone associates grass with the colour green, I feel it works and that you can see that represents grass. Again I used the same technique when creating the sky, I used the square tool with a blue outer line and a blue fill, again representation also allows for the colour blue to represent the sky.


After I created my background I decided to create my actual Hello Kitty character, I started by creating the head of Hello Kitty, to make the head I used the straight line tool and then used to the curve tool to bend the line. I will show how the image looks with only straight lines and then how it looks after I have created the image. The image below is of Hello Kitty’s head without using the curve tool.
The image prior to curve tool

The image when curve tool has been used

As you can see from a simple readjustment of lines you can create an image that resembles the Hello Kitty character. To use the curve tool you need to select the pointer device on the tool bar, the icon is shown below. To use the tool you need to go next to a line which you wish to curve however you do not select the line you just go close to it, the pointer will change to a curved line which indicated that you are close enough for the curve to take effect.

You will then start to use the fill tool, this allows you to add colour to an image if all the lines meet up. Also in the image below I have ensured that the bow is of more quality. If you enlarge the image then you will be able to see that the head is white and the box is read, however due to the fact that I have connected al the lines you can select the background, this is indicated by the black dots.

Now that I have created the head I use the same style of technique to create to rest of the Hello Kitty character I will show in screen dumps each individual body part of Hello Kitty and then show it all joined up to create a final image.
From the head it is important to have the eyes as this is a clear defining feature of Hello Kitty, as many of my actions include eye movement it is important for the eyes to be on a separate layer. To make the eyes I used the circle tool, I used a black outline with a black fill, the button for the circle tool can also be seen below.


The next image is of the body of hello kitty again I used the line tool to create a basic outline and then used the fill tool to colour the outfit of Hello Kitty in, also to create the dress look I had to create two lines and then use the curve tool to bend the two lines to make it look as if there are two garments.

Next I will be showing you the whiskers; this was a very simple drawing as the whiskers on Hello Kitty are just straight lines that emerge from the cheeks of the Kitty. For this I used the line tool with no curve. Also in the whiskers layer I decided to include the nose as usually if you move your nose your cheeks would also move, this is from looking in the mirror and emulating facial expressions and seeing what moves with what. The whiskers are all created with black lines and the nose has a black outline with a yellow fill.

Arms are important in the production of Hello Kitty animation due to the fact that allot of the actions that I want her to do will include the movement of her arms. Also I want on occasions for one arm to move however the other to not, therefore I decided to make a right arm layer and a left arm layer. They are essentially the same image but flipped over, they are made using the same tools and fill, and the reason for this is consistency. I used the straight line tool and the curve tool to make the arms, the curve tool is for paw at the end of the arm. I did this by creating two lines and then curving each side so that it would create a semi circle almost.


From watching videos of Hello Kitty and looking at pictures the feet of Kitty is important as they have not changed since the original design, therefore I have chosen to conform to the norms and create the feet in the same style. To create the feet I used the circle tool with a black outline and a white fill, and to ensure consistency I copy and pasted the original foot. The image below is of the two feet.

Now that I have drawn out the image of Hello Kitty on separate layers, and drawn out a background I will now show all of the layers together to see how it looks. The image below is of all layers shown.

One of the parts of this assignment is the inclusion of user interaction with a character; therefore I am going to create buttons for the users to select which will result in an action. The first action that I am going to create is for Hello Kitty to wave. I decided to make this frame by frame as I liked the jolty look that it brings, the reason for this is that it reminded me of Hello Kitty’s anime origins where fast movements are not smooth but you only see the beginning and end of the movement. The way that I did this is by locking all other layers on the layers task bar, a layer is indicated as being locked when there is a padlock symbol on that layer. I started this movement on frame 10. I started by adding a key frame onto the timeline you can do this by right clicking on the frame you want and selecting insert key frame. The image below shows this taking place.

On this key frame I move the arm to a higher position than normal to try and create the action of waving, I did this by select the free transformation tool on the toolbar. The icon for this tool can be seen below.

This tool allows you to move item about on a selected layer, the image below shows what it looks like when you select the tool and then the object to move. If you go to the corner of the image you can then move the object by angle this is the perfect tool to create a wave motion as all you need to do is change the angle of the arm several times.

To change the arm movement several times it is important to add many key frames, the screen shot below shows how it looks on the timeline with the key frames.

As my video is going to be controlled by buttons with a stock image as an opening screen it is important to include the buttons in the production of this movement. So I created a new layer called button, created a square and then converted it into a button. This is done by selecting the square right clicking on it and choosing convert to button, the image for this can be seen below.

When you select this option you are given a new dialogue box that pops up. This can be seen below.

After you have done this when you double click on the button you are given another set of options on the timeline, this again can be seen below. On this menu you can select what happens to the button when an action is performed clicking, hovering, standing and when the button is pressed.

To ensure that the button works you need to add some action script the way to do this is click on the button and select the actions option on the menu. You will then be given another screen where you will add action script to you flash project.

The action script needed is to start playing a video at a certain point in this instance it is at frame 10, the image below shows the code needed to play the video at that point.

The problem with this is that it will continue playing the video until all the frames are over so in the timeline I selected at frame 20 for it to go back to frame 1. The screen shot below shows this.

Another problem that I needed to sort out is the fact that when the video is first played it would play regardless of a button being pressed therefore on every frame at frame one I needs to add some action script that tells the video to not play. This would ensure the movie is entirely user dependant.

The only layer that this does not apply to is the layer with music on it this is because I wanted a continuous loop of music regardless of a button being pressed or not.
The smile button and animation works on the same principle, it is a frame change rather than a motion tween or a shape tween. Again the reason for this is the origins of the Hello Kitty anime and the sharp movements to emphasize emotions.

And once again the wink button works on the same principle as the other two, I decided to add this into the buttons as I did some more research on Hello Kitty animated series and I noticed that in one particular episode Hello Kitty winked a considerable amount. The sharp wink again is in line with the origins of the anime nature of Hello Kitty.

The last action that I will talk about is the button called gardening; this is a more complex animation as it included frame by frame action as well as motion tween actions. When you press the button which the action script is set to start playing at frame 40, the first thing Hello Kitty will do is stand up. The way that Kitty stands up is via a motion tween, I selected all of the component layers that make up her body and inserted a key frame 5 frames later on this key frame I then moved Kitty up to where i want her to be when the motion tween is finished then I right clicked on the timeline and selected add motion tween. All of this is shown in the images below.
All images selected except feel (will be clear later)

The timeline and motion tween from frame 40-45

The feet however are a motion tween and a resize; this is because if the feet would have stayed the same it would not look rite. Along with this the eyes do not go straight up but to the left as to indicate where Hello Kitty is going to water the ground. On the left hand a watering can appears, this is built on a separate layer. The eyes feet and watering can are all shown in the screen shot below.

After Hello Kitty has angled to face towards the ground water in the form of droplets come out of the watering can and drop to the floor. This water is made out of blue paint dots and converted into a movie clip. This is done in the same way that you convert to button. The screen shot below shows the process.
Result of right clicking on group of images

Dialouge screen given

When converted in a symbol it will appear in the Library

The motion tween here is the motion from Hello Kitty bending down and the water coming out of the watering can towards the floor. The next action on this section that Hello Kitty takes is to stand upright again and then become frustrated with the fact that a flower hasn’t bloomed yet. She frowns and eyebrows turn downwards towards the ground. Again from watching Hello Kitty animation series I have seen that when a character gets angry it is a sudden explosion of anger therefore again I chose to have it a sudden change of expression compared to a tween. The screen shot below shows the angry emotion.

The next thing to happen in this animation is a flower emerging all of a sudden and Hello Kitty’s facial expression changing all of a sudden. This once again keeping in tradition with the previous emotion changes is sudden. As anime has a tendency to take things to extreme emotionally, I felt that when the flower grows that love hearts should appear from above Hello Kitty’s head. This can be seen below. The Hearts have been drawn using the pencil facility in macromedia flash and then converted into a movie clip and given a motion tween to drop from the sky. Once they are recognised the hearts then disappear. I achieved this by deleting the hearts and adding lines to represent a sudden change.


After this has happened once again action script will take the video back to the start. The action script can be seen below.

When my Hello Kitty animation is playing I wanted to use the opening soundtrack to the series Hello Kitty and friends. Therefore I purchased an episode of Hello Kitty and friends and then converted the .fla to a .wav file. I did this by using software called any video converter. From this I then used another piece of audio software that allowed for the chopping and exporting of .wav files and played it in my flash project. After it was inserted into my project I made the song on a constant loop and for the song to start when the video is first started. Initially the song was on play on event which resulted in a terrible overlap. So to create the sound I made a new layer and called it music, and then in the bottom tool bar it has an option for music. The image below shows the tool bar for music. To import the song you need to select file import and then select import to library, you will then be given pop up and a route file with sounds in them. You select the sound you want and then it will be stored in the library.


When you have produced your flash video and are ready for the final version to be published you need to select the option from the file toolbar called publish. The screen shot below shows the action of publishing and the options selected that would allow the user to publish. For the sake of demonstration I have gone into the publish settings to show you what I have done.

The file formats required for this assessment is an .exe and an .flv in flash player 8. As you can see from the screenshot below that I have both of these formats selected ready to be published


Technical detail
When working in macromedia flash and when you create a flash video it is important that you select an appropriate frame rate, the reason for this is you should work at the optimum speed for your video. The frame rate is the amount of frames the user will see in a second. Motion pictures would work at 24 fps, and web browsers are capable of working at 14 fps. In my flash animation I am going to be working at the set frame rate of 12 fps. I selected this due to it being a smooth finish when viewing the movie. To select the frame rate you need to click on your work aria where you will create the images and right click, you will then be given a menu with many options on it. You need to select the document properties option.
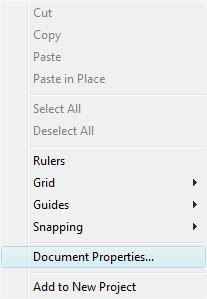
When you have selected this option for the menu you will then be given a dialogue box which again gives a vast amount of option to the user to change about the video, in this section of the blog this pop up dialogue box will be used several times. The box can be seen below.
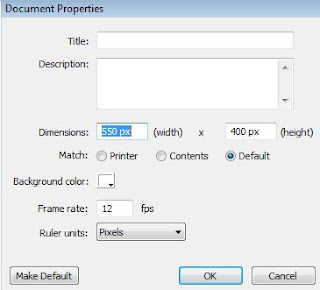
This is where you would select the options for fps. As you can see from the screen above it is currently on 12 fps, this is what is given to the users as a stock speed for your video and I decided to use this as it gives a smooth video finish. Also from this screen you can select the size of the screen you wish to show when a user attempts to view the flash video. When selecting a size for a video you are also given the option for a measurement for example pixels, centimetres, millimetres and inches. Again you can see this from the screen dump above.
I have chosen the screen settings to be 550 widths by 400 lengths in the pixel measurement. This is because I feel this is the perfect size for Hello Kitty to sit on the grass and for all of the buttons to be in one screen, also when Kitty is performing her actions they also fit perfectly on the screen.
One of the key things to consider when dealing with the exporting of your flash video is the quality and size of your video, there is a direct correlation between the quality of your video and the size. An example of this is if you are to increase the quality of your image then the size will become bigger. This applies the other way around and reduction in quality will create a smaller file. The screen dump below is the pop up screen that you are given when choosing the export flash video option.
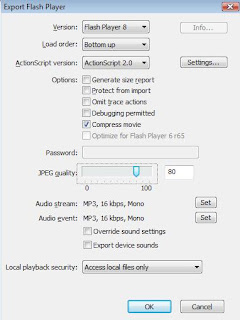
As I have said before when selecting a file size in relation to quality it is important to get a good balance of size and quality so if you enlarge the screen dump above you will be able to see that I have selected a quality of 80 out of 100, this is because the video looks and plays very smooth, the file size is large in relation to a lesser quality however I would rather my video played smooth if it means a little bigger.

When you have selected this option for the menu you will then be given a dialogue box which again gives a vast amount of option to the user to change about the video, in this section of the blog this pop up dialogue box will be used several times. The box can be seen below.

This is where you would select the options for fps. As you can see from the screen above it is currently on 12 fps, this is what is given to the users as a stock speed for your video and I decided to use this as it gives a smooth video finish. Also from this screen you can select the size of the screen you wish to show when a user attempts to view the flash video. When selecting a size for a video you are also given the option for a measurement for example pixels, centimetres, millimetres and inches. Again you can see this from the screen dump above.
I have chosen the screen settings to be 550 widths by 400 lengths in the pixel measurement. This is because I feel this is the perfect size for Hello Kitty to sit on the grass and for all of the buttons to be in one screen, also when Kitty is performing her actions they also fit perfectly on the screen.
One of the key things to consider when dealing with the exporting of your flash video is the quality and size of your video, there is a direct correlation between the quality of your video and the size. An example of this is if you are to increase the quality of your image then the size will become bigger. This applies the other way around and reduction in quality will create a smaller file. The screen dump below is the pop up screen that you are given when choosing the export flash video option.

As I have said before when selecting a file size in relation to quality it is important to get a good balance of size and quality so if you enlarge the screen dump above you will be able to see that I have selected a quality of 80 out of 100, this is because the video looks and plays very smooth, the file size is large in relation to a lesser quality however I would rather my video played smooth if it means a little bigger.
Subscribe to:
Posts (Atom)